As I said earlier, I built this cheap & simple canoe first, before I went on to go for the bigger one.
Unfortunately, I didn't take any pictures of the building process, only from the finished boat.
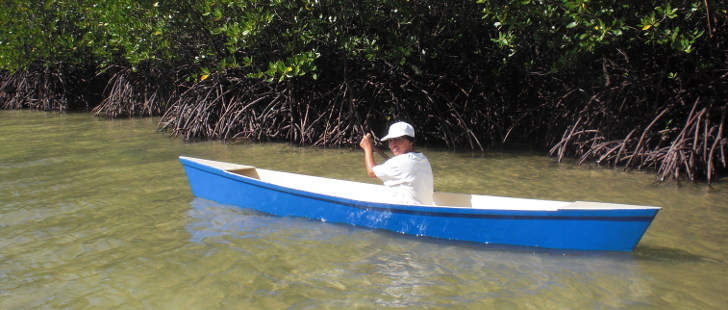
After all the boat is very light, you can easily carry it by yourself or strapping on the roof of your car.
How much did it cost?
Well, it would cost as much as 2 sheets of 6 mm plywood and maybe 1.5 gallon or 5 Li of Epoxy resin. Fiber mat is so cheap, I wouldn't even mention it.
I had to buy all the material in the Philippines and I paid about 20 US$ for the 2 sheets of plywood and 95 US$ for 1.5 Gallon of Epoxy & hardener. Of course you need some other stuff like brushes, rubber gloves and I also bought a roller for the fiber mat to straighten. The later was not really needed, I did that with a brush later on.
Cutting the Plywood
At first you need to transfer the plan via a grid on the plywood. Then you'll have to cut the plywood along the outline of the boat.
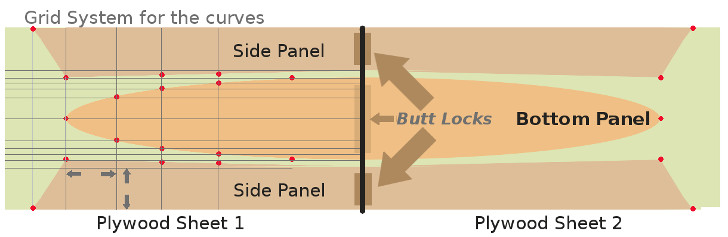 This is how your 2 plywood sheets look like, after you transfer the plan on the plywood for cutting
Because the boat is twice as long as the plywood sheets you will have to set 3 butt blocks! Two for the side panels and one for the bottom of the boat. If you want to make the butt blocks with plywood, you'll need a little more than the two sheets. But you can do it with a stripe of fiber mat as well.
After you glued the butt blocks, you may rest for one night to let the epoxy dry and harden. This was the work of the first day.
Assembly of the boat
The next day, when the epoxy is hard and dry you can already assemble the boat, using cable ties. Stitch the two side panels together at the bow and stern, then unfold the two panels and fit the bottom panel on it. When the 3 panels are assembled and tied, you can already start to glue it and tape it with stripes of fiber mat. See the stitch & glue how to for more info.
When you line up the panels for stitching, don't worry about some small gaps between the panels. As long as they are not too big (< 12 mm), you can easily cover them with filler and fiber mat.
You will probably need two days for this job: one for inside and one for outside. Always Do the inside first.
On the third day you should glue some battens as a reeling. They will stabilize the hull and keep the boat in shape. I found out that it is a good idea to also glue one or two battens under the boat along the centerline as a keel.
Day No 4 is for sanding the whole body of the boat. If you did a smooth job with the fiber and the epoxy before, there is not too much to sand and you may already start to paint all parts and sides of the boat with at least two or three coatings of epoxy. No need to wait until the first coatings are 100% dry. One hour between the coatings should be enough. After the last coating, let the epoxy dry over night.
On day No. 5 it's time to sand again and you may already start to paint the boat. Use epoxy paint or simple acrylic paint in the color of your choice.